Search for a service...
- No Results
An AC, when installed correctly will be more efficient and work as it is designed to. Not only will it be more efficient, it will also minimize unwanted noises and vibrations.
| Pricing | Fixed pricing |
| Duration | 30 mins - 2 hrs 45 mins |
| Turnaround Time | 2 hours |

Really they are too good person ,In my home There is a problem on wall, to mount outdoor unit. But they are xperienced person. They have manage everything,even they work for 9 hour till AC is not installed. Hats off for your services. I advice to all of you ,kindly given a chance to serve in your home. Regard Sandeep

Though I cancelled my initial booking, I got the same technician for a later date. I must admit Mr. Sharif and his team had all the traits of professionals and completed his designated work with all his heart. Great job guys. I would recommend Modern Electronics for AC installation and service works without an iota of doubt.

Great job by Abdul. The previous technician from mr right did a shabby job of AC un-installation but Abdul came to rescue and installed it flawlessly. He was polite and courteous as well. Ask for Abdul for AC services when you call me right.

Very fast response by MR RIGHT customer Care on a mail,thereby App installed.Task listed by me immediately assigned and completed in 2 hrs flat by concerned vendor in professional and satisfactory manner.Nice startup and well managed.

Extremely wonderful service. Professional behavior. I am very happy with the service and never seen this much dedication towards this installation work before. Really appreciate 👍🏻

Very professional, transparent about pricing, good work. Only minor issue was the cementing of the hole in the wall for the pipes could have been better

Very nice and intelligent mechanic . He knows very deep knowledge of ac . Please go for it . And one more thing he is honest person.

The guy was great . He completed his work very quickly and efficiently. I will give 0 star to MR RIGHT BUT 5 for this person

Very Good service provided by them ,they are professional in their work and cost effective also keep the good work on....
Services provided by Dharmendra is awesome. He completed his task on time and done in a very professional manner. 😊
For window AC
installation starts with removing the glass or mesh from the window. A window
AC unit is heavy and require at least 2 people for installation.
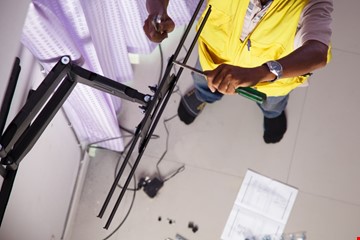
A window AC unit has following parts:
Window AC installation requires following tools
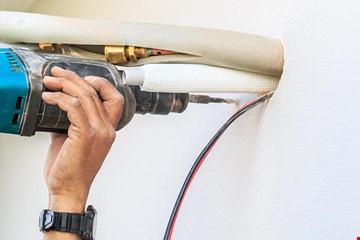
In window AC installation, first the outer
case is securely fixed in the window with the help of screws. The inner unit of
window AC is then firmly fixed inside the outer case with the help of screws.
After the inner unit of window AC is properly fixed in the outer case, the
window AC is switched on to check if it is starts properly. Then the front
screen or the cover is gently fixed on the inner unit. Finally the air filter of
window AC is inserted in place and the front cover is closed.
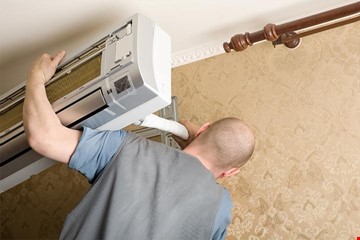
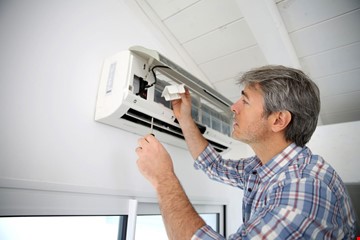
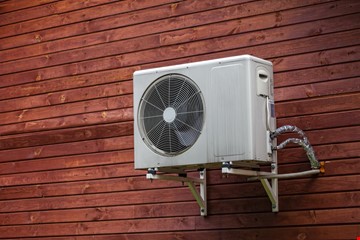
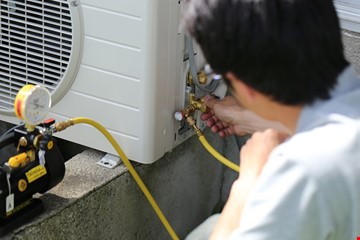
Split AC installation starts with deciding the location of indoor and outdoor unit of air conditioner. After the location is confirmed, installation of indoor unit is started.
A Split AC unit has following parts:
Split AC
installation requires following tools:
| Window AC installation | ₹699 |
| Split AC installation | ₹1699 |
| Window AC installation | ₹699 |
| Split AC installation | ₹1699 |
| Window AC installation | ₹699 |
| Split AC installation | ₹1699 |
| Window AC installation | ₹699 |
| Split AC installation | ₹1699 |
| Window AC installation | ₹699 |
| Split AC installation | ₹1699 |
| Window AC installation | ₹699 |
| Split AC installation | ₹1699 |
| Window AC installation | ₹699 |
| Split AC installation | ₹1699 |
| Window AC installation | ₹699 |
| Split AC installation | ₹1699 |
| Window AC installation | ₹699 |
| Split AC installation | ₹1699 |
| Window AC installation | ₹699 |
| Split AC installation | ₹1699 |
| Window AC installation | ₹699 |
| Split AC installation | ₹1699 |
| Window AC installation | ₹699 |
| Split AC installation | ₹1699 |
| Window AC installation | ₹699 |
| Split AC installation | ₹1699 |
| Window AC installation | ₹699 |
| Split AC installation | ₹1699 |
| Window AC installation | ₹699 |
| Split AC installation | ₹1699 |
| Window AC installation | ₹699 |
| Split AC installation | ₹1699 |
| Window AC installation | ₹699 |
| Split AC installation | ₹1699 |