

It is a fact that all of us are dependent on water for survival and the best way to get unlimited supply at home is through a water pump. But a solar water pump is a better idea as it makes use of sunlight and not electricity to draw water for you. If you are someone who is interested in installing a small scaled or a large scaled solar water pump at home or office, then this article will prove useful. It will help you learn the steps or procedure to follow for installing solar water pump. So read on to find out.
Parts and tools needed:
Parts
- Anti-Corrosion Paint.
- 2X 7ft I-beams.
- 4X 11ft I-beams.
- 63ft C-channels.
- 3X 24.46ft C-channels.
- 18ft C-channels.
- 5X 20.84ft C-channels.
- 21X Solar Panels
- Solar Pump System Controller
- Cable
- Solar Pump
- Concrete/Cement Mixture.
- 6X Circuit Breakers.
Tools
- Screwdrivers
- Welding machine and welding rods.
- Wire Cutters.
- Drills
- Spirit Level Bottle.
- Digital Multimeter.
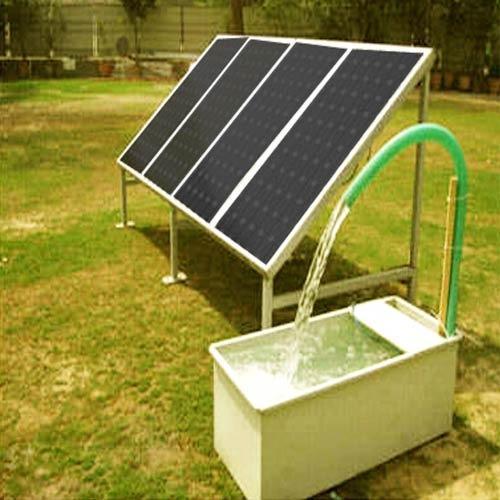
STEP 1: Set up the solar panel stand
A Solar panel does the work of supporting the pump and consists of I beams and C Channels. Before you start building this metal framework, you must find out the appropriate solar angle. Solar angle is the optimum angle at which the panels or pump will receive the maximum sunlight. Angle the panels towards the sun and to find it you can use an online calculator.
Also you need to paint all the beams and channels with a layer of anti rust or anti corrosion paint so as to avoid them from getting corroded in the future. Build the metal framework after this.

AstroAI Multimeter
Digital Multimeter with DC AC Voltmeter and Ohm Volt Amp TesterThis Multimeter is designed to troubleshoot a variety of automotive and household electrical problems safely and accurately
STEP 2: I-Beam placement and foundation
Follow the given steps to place the I Beam and set up the foundation:
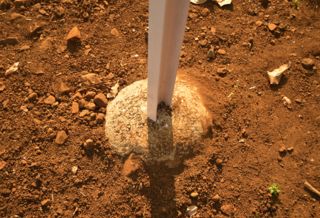
- Firstly, dig a hole of dimensions 2 ft x 2ft x 2ft in the ground followed by adding concrete into it.
- Place the I beam into the hole in such a way that it is at a right angle to the ground.
- Fill the hole with concrete after ensuring 2 ft of beam is in the ground.
- Place another beam at a distance of 24.46 ft from the first one following the same procedure.
STEP 3:Add lower C Channel
Now you need to place a lower C Channel by following the given steps:
- Place the C Channel parallel to the ground and ensure this by using a level bottle
- Now bolt each of the ends of the C Channel to the I Beams. Use stainless steel bolts and nuts for this.
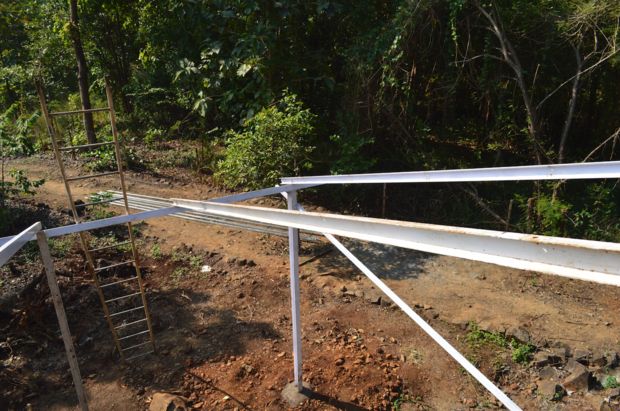
STEP 4: Add other beams and channels
In this step, you need to add the remaining beams and channels following the given steps:;
- Add 2-7 ft I beams on top of 2-11 ft I beams. Attach a 24.46 ft C-Channel to the beams.
- Now in the two remaining corners, place and fit the 2-11 ft I beams perpendicular to the ground.
- Like before, add the remaining channels to these beams.
- You also need to add the inclined channel which has dimensions 5×20.84 ft
STEP 5: Adding solar panels
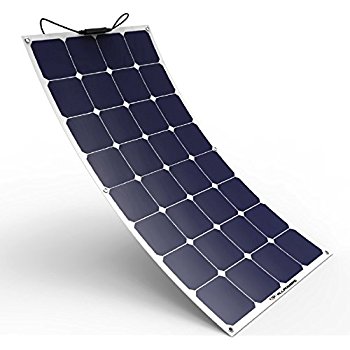
Once all the beams and channels are fixed, you need to add the solar panels. You need to add 21 of these panels. The panels must have the given specifications:
- Power-280W
- Voltage at Pmax-35 V
- Lenght X Breadth X Height(mm)-1960x990x42
For fixing the panels, you first need to bolt them to the C-Channels. The distance between them should be 0.25 ft from each side. Connect the solar panels by first opening the solar panel connector box and then using a multimeter to find the polarity of the solar panel. Connect 7 solar panels in series to form one string. 3 such strings will be thus formed.
STEP 6: Make the electrical connections
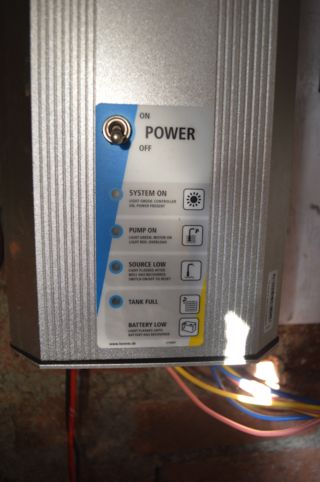
In order to get output out of the framework, you need to make the appropriate electrical connections. Do this with the help of an electrician or refer to the pump manual for the same. Remember that the solar pump system controller is the brain of this installation process and its working. This controller regulates the current supplied to the pump from the panels.
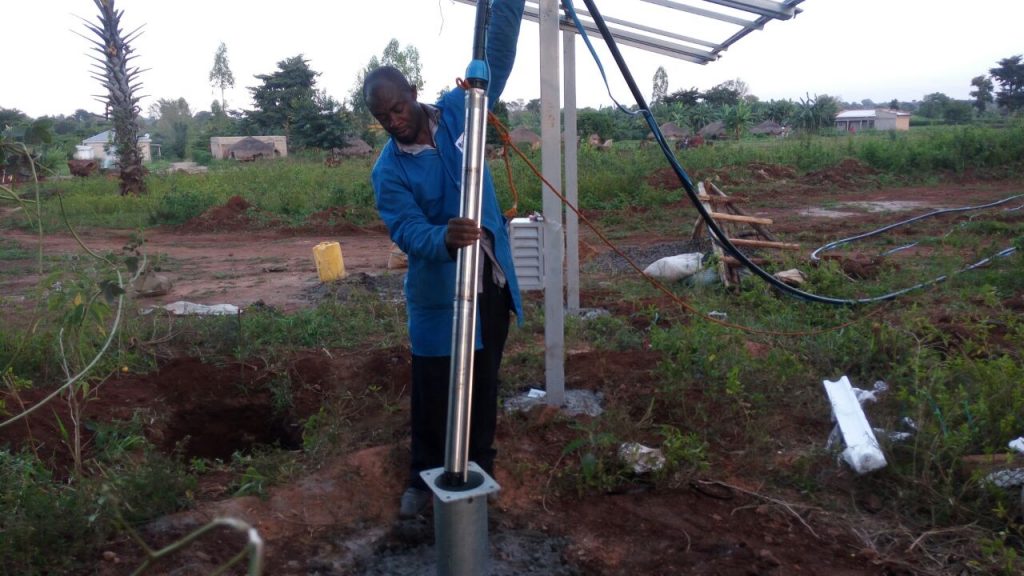
STEP 7: Solar water pump
The solar water pump uses the power supplied from the panel array to pump water from the source. It comes with 3 wires for each phase and one wire for ground. Make sure you choose a good pump depending upon your requirement.
Now that you know the detailed process of installing solar water pump, you can easily do so for yourself at home. However it is always better that you contact a professional for the same since this process may seem easy but is rather complicated and involves usage of many parts and tools. There is a gamut of professionals out there who can help you with this process to make sure everything is done correctly. If you are looking for solar water pump installation services, then you can contact Mr Right.
Loading recommendations...


Excellent description. I am trying to duplicate your work on a smaller scale. I have built a set-up somewhat like you described. I used one 100 W solar panel, an inverter, a 12 volt solar battery (mighty max), and a Top Solar charge converter. I am stuck on the capacity on the submergible pump? How much hp do I need to move water 50 feet horizontal, and, can it even by done with my set-up?
very impressive information about process of installing solar water pump .
very impressive. This article gives complete information about the installation of the solar water pump and also uses a very good image.
Good ! nice information
These are very good solar panels and I am pleased to see that more and more companies and people are gradually starting to join this trend to save our planet and switch to alternative energy sources. A month ago, I called firstenergy customer service at https://firstenergy.pissedconsumer.com/customer-service.html and asked to tell me how much it costs to install all the necessary equipment for the transition to solar energy. I was asked to send the electricity bills for the last year and the dimensions of the house. Should send a report soon.
should the panels be situated next to the borehole, what is the required distance between the panel and borehole. Can i place my panel 400m from the borehole ?
It is super keep it up
Amazing! This article is a detailed guide on Installing solar water pump. I understood all the steps. Thank you for sharing this wonderful article.
Can you just run a solar pump with a float valve on a stock tank, without having to use a holding tank?